Users Guide
Chapter 10. eCommerce - Online Shop
Electronic commerce or eCommerce is a term for any type of business, or commercial transaction,
that involves the transfer of information across the Internet. Your website allows you to build an Online
Store, easily. This means that you can sell your products and services on your website. Multiple ways
to accomplish this are provided. You may use PayPal buttons to quickly setup a shop for several products or
services and also to take donations. If you have a Merchant Account (A merchant account is a type of bank account
that allows businesses to accept payments by payment cards, typically credit cards), you may add your account information to
set up processing transactions on your Merchant Services providers Gateway. Several Gateways like Elavon/Converge, Authorize.Net and PayPal PayFlow are supported.
To add a Merchant Account, login to your site and go to the Admin section. Click the
ECOMMERCE
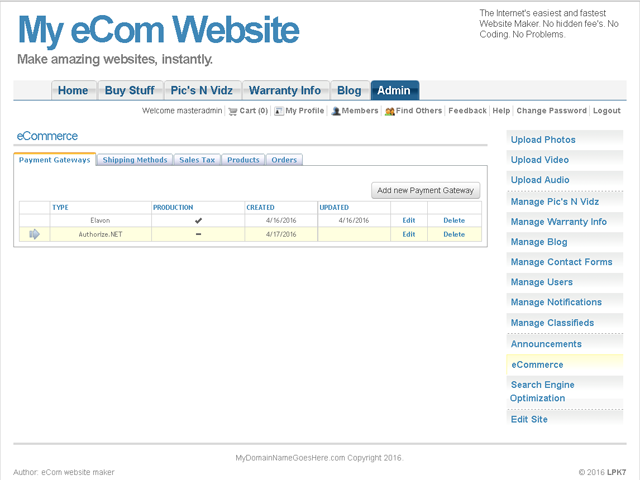
link. Once you click the eCommerce control you will see the following screen which shows the currently
installed Merchant Accounts. These are listed by TYPE (Name) with the current Gateway being used marked by an
arrow in the leftmost column. Accounts have two modes, the PRODUCTION (process real payment cards using a real merchant account)
column will show a checkbox for accounts not is SANDBOX (test process fake payment cards using a fake merchant account) mode.
Click the EDIT link to change existing account information. Click the DELETE link to erase an account. Click the ADD NEW PAYMENT GATEWAY button to install a new account.
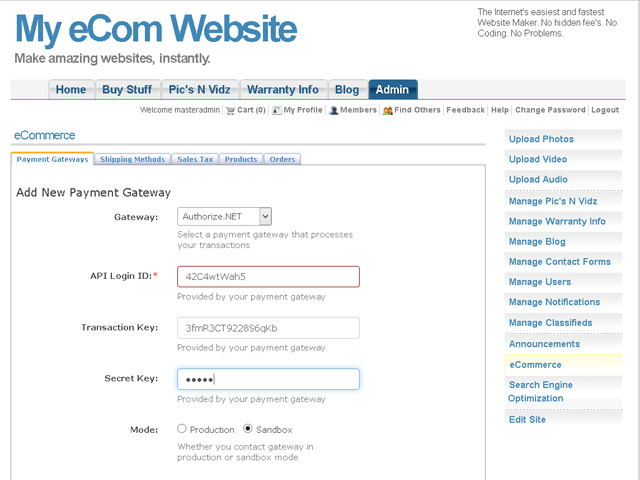
Choose the GATEWAY for your account type from the dropdown list. Input your MERCHANT ACCOUNT credentials.
Click the PRODUCTION radio checkbox if you have a legitimate Merchant Account and are fully ready to open your store to the public. If possible you may want to use
test account information (available from your Merchant Services provider along with test Credit Card numbers) in SANDBOX mode to test your store before you
launch. This allows you to learn how to use the store and practice selling products without requiring real credit card payments.
Click the SAVE button.
Some products require that a shipping cost be included in the total price of the item.
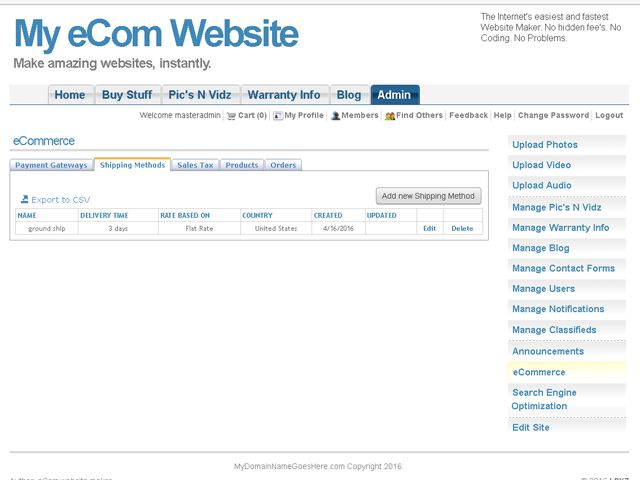
To include shipping cost and to select the way you want to calculate these cost,
click the SHIPPING METHODS tab. Click EDIT to change an existing entry or DELETE
to erase one. Click the ADD NEW SHIPPING METHOD button to add a new listing.
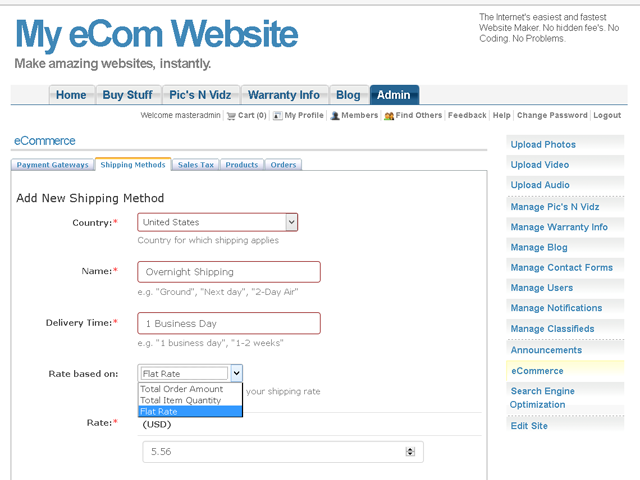
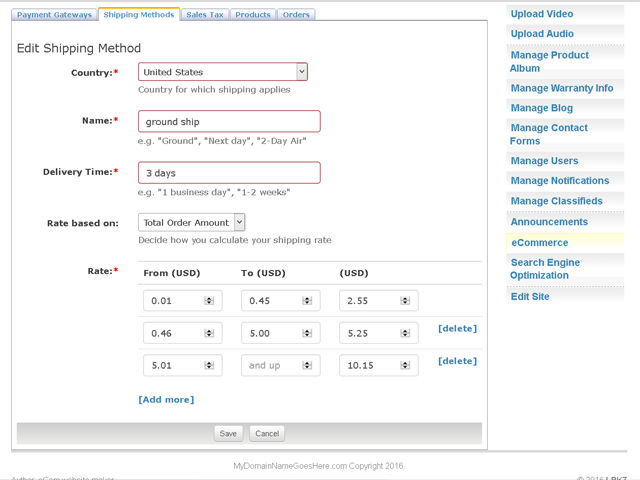
Input the COUNTRY the product ships from, NAME your shipping method (Ground Shipping, Express etc.)
Input the DELIVERY TIME (1 Day, 1 Week, etc.), then select from the drop down menu how to calculate
shipping cost. Input the method used to figure out the RATE. Choose FLAT RATE as illustrated below to assign a fixed amount to shipping no matter what or how many or
how much products are ordered and cost. Click the SAVE button if this is your final choice.
Choose TOTAL ORDER AMOUNT as illustrated below to assign shipping cost based on the total
cost/price of the order. You simply assign a particular cost to any shipment that falls between the specified amounts (FROM and TO).
Click the SAVE button when ready.
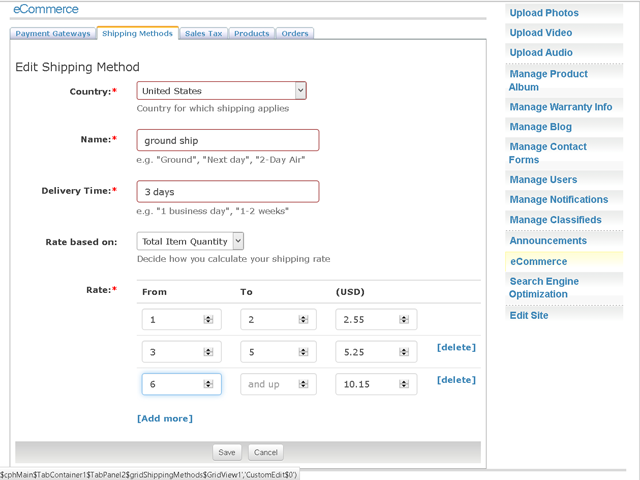
Choose TOTAL ITEM QUANTITY as illustrated below to assign shipping cost based on the total
number of products ordered. You simply assign a particular cost to any shipment that falls between the specified amounts (FROM and TO).Click the SAVE button if this is your final choice.
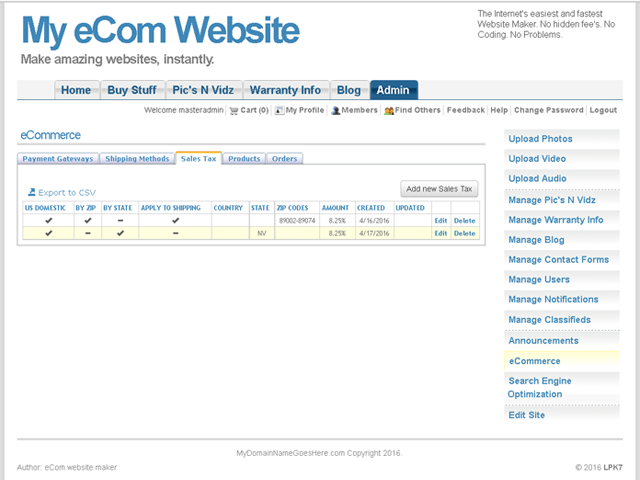
Sales Tax is required in some places for items sold. You configure these settings by clicking the
SALES TAX tab. Click EDIT to change an existing entry or DELETE to erase one. Click the ADD NEW SALES TAX button.
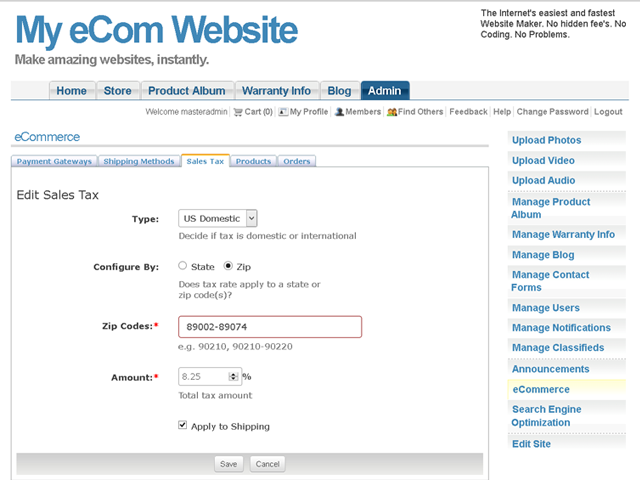
Use the TYPE drop down menu to select either US domestic taxes or International. Select the radio checkbox to
CONFIGURE BY State or Zip Codes. For International tax, see instructions below. Input the AMOUNT as a percentage of
the total. Apply taxes to shipping cost by checking the box. Click the SAVE button.
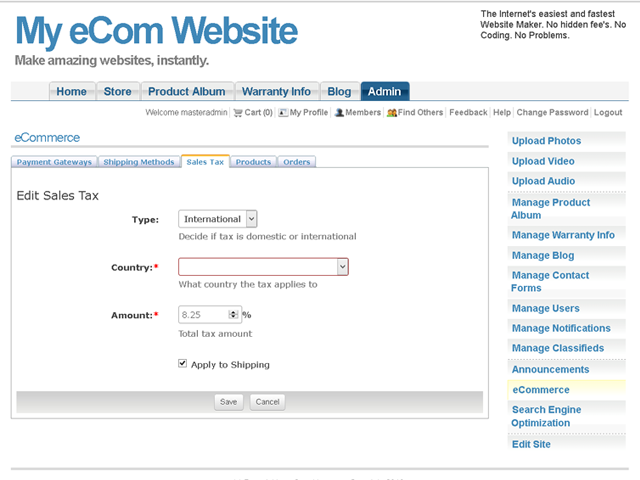
For International tax, select the COUNTRY. Input the AMOUNT as a percentage of
the total. Apply taxes to shipping cost by checking the box. Click the SAVE button.
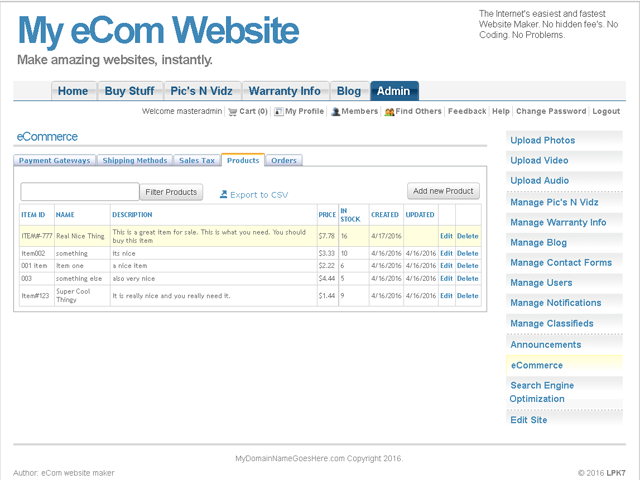
To add item ID's, product names, descriptions, prices and set stock quantities of Products for sale, click the PRODUCTS tab.
Click EDIT to change an existing entry or DELETE to erase one. To search for a particular product listing, enter the product
name into the search box and click the FILTER PRODUCTS button. To add a new product click the ADD NEW PRODUCT button.
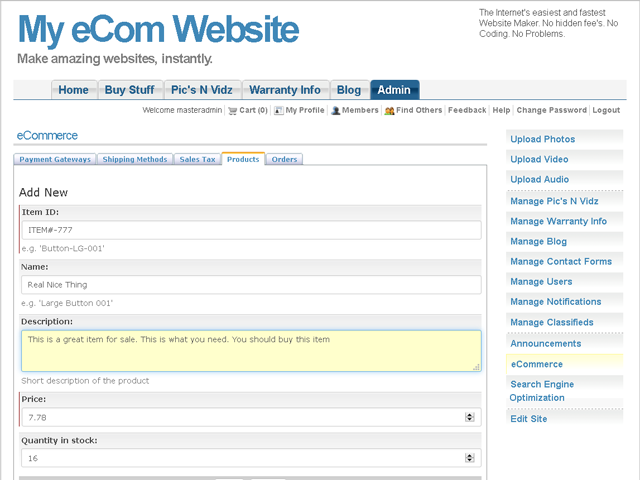
Input an ITEM ID, NAME, DESCRIPTION, PRICE and QUANTITY IN STOCK for the product. Click the SAVE button.
NOTE:A notification
will be sent to the site owner/admin email for any sales and if the stock level for a product reaches zero (0).
To view a history of completed sales, click the ORDERS tab. A history of both completed and incomplete orders can be shown (Click the SHOW NOT COMPLETED checkbox to see
incomplete orders).
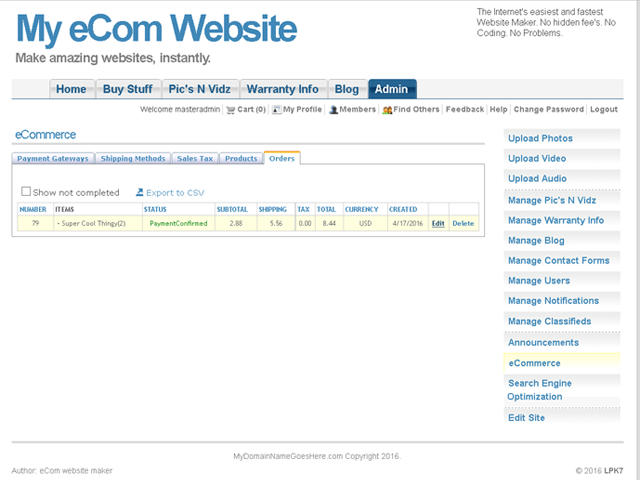
Click EDIT to change an existing entry or DELETE to erase one.

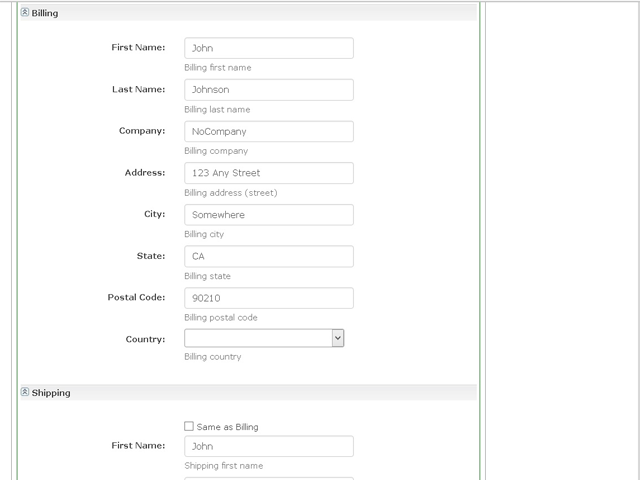
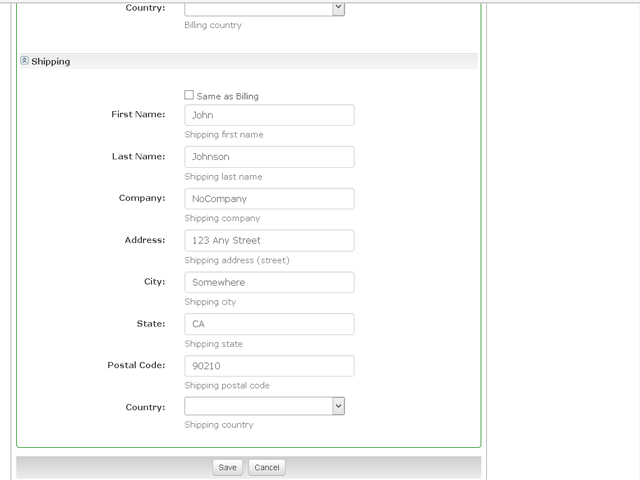
NOTE: All Payment Gateway's do not function the same. Whenever a Gateway provides additional information such as customer name,
email, billing or shipping info, then that information will also be available to you in the order record.
Additional information is shown when available. Example below:

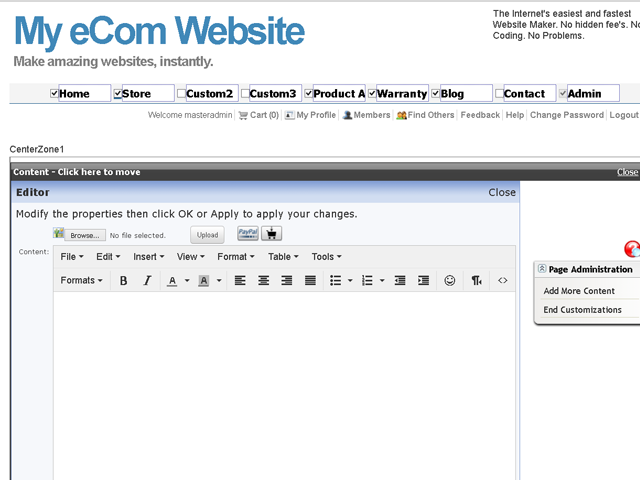
Any BLOG entry or CUSTOM PAGE can be turned into a shopping page. Use the PAGE ADMINISTRATION control (you can move this control
around the page to make editing things easier), Click the CUSTOMIZE THIS PAGE link. Click the EDIT link in the center content area of the page.
Along the top of the editor are both a PAYPAL Payments button and an eCOMMERCE (Shopping Cart) button.
If you would like to add PayPal buttons (BuyNow, Donate) then simply click the button and proceed as detailed in
: Chapter 2 - Editing Your Site / Adding PayPal Shopping Capability. If you have a Merchant Services account then you
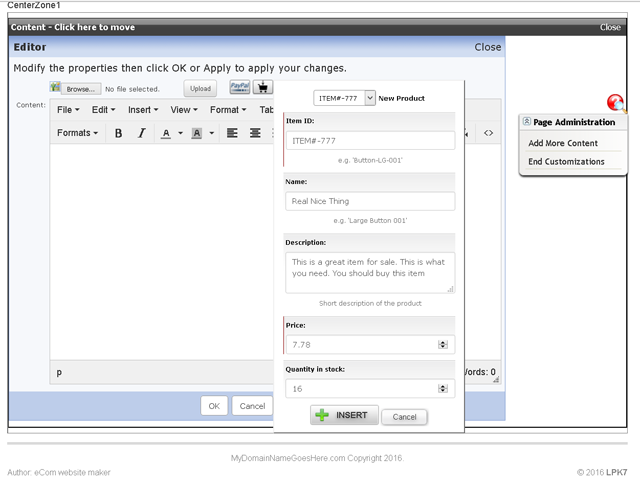
can create a Shopping Cart and take advantage of the eCommerce features outlined in this chapter. Click the SHOPPING CART button (the button is to the right of the PayPal button).
Select a PRODUCT to sell on this page from the drop down menu or input a new product. Click the INSERT button.
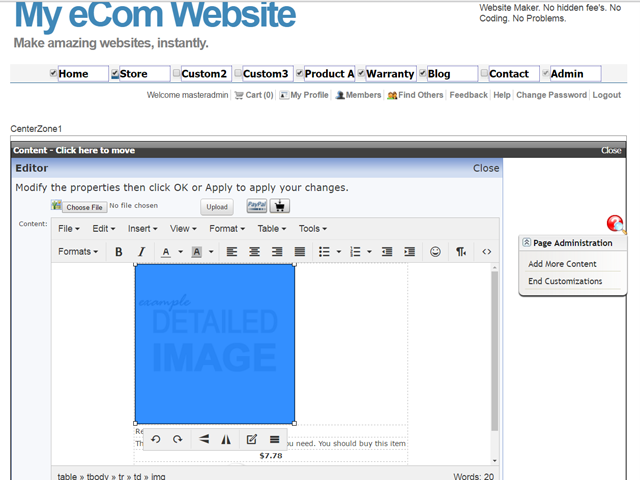
Click the BROWSE button at the top of the editor and select a picture of the product to use in the listing.
Click the UPLOAD button. Drag N' Drop the photo right onto the DETAILED IMAGE placeholder. Click the now undesired
placeholder (the generic graphic should now be below your freshly uploaded product picture) and press the DELETE KEY
on your keyboard.
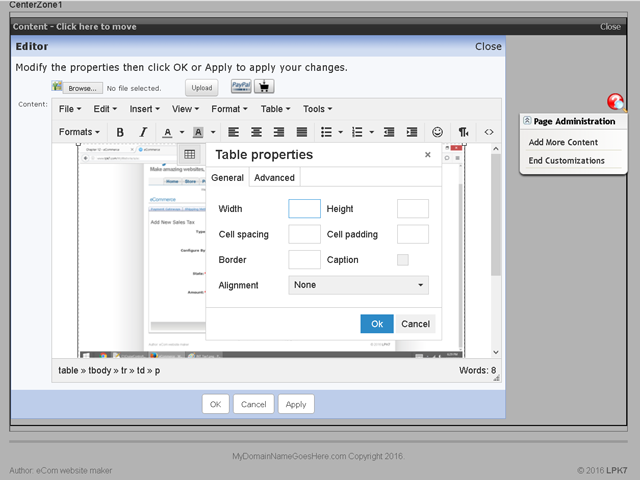
NOTE: Clicking on the empty space surrounding your product picture will show a TABLE EDITOR which you can use for
customizing the product listing with columns and rows in the table.
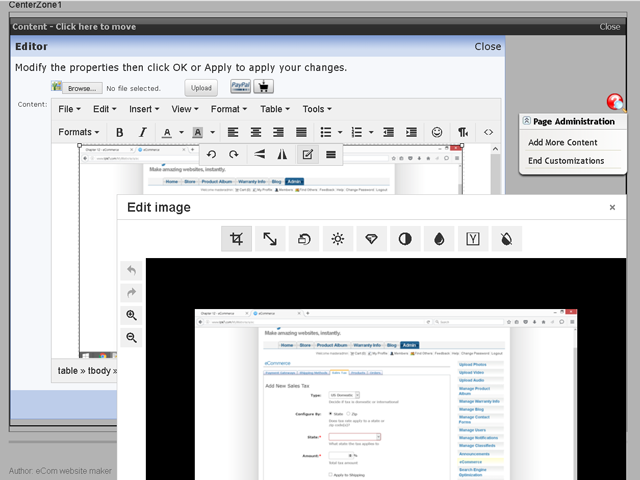
NOTE: Clicking on the product picture itself will show a GRAPHICAL EDITOR which you use to manipulate the picture
itself in ways like, rotating it, changing the sharpness level and many other ways.
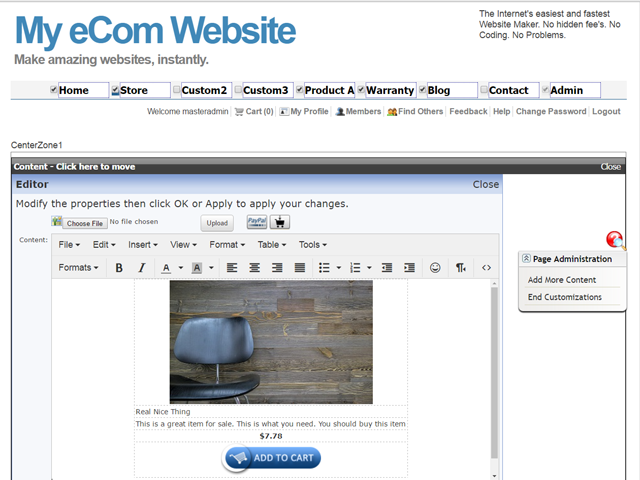
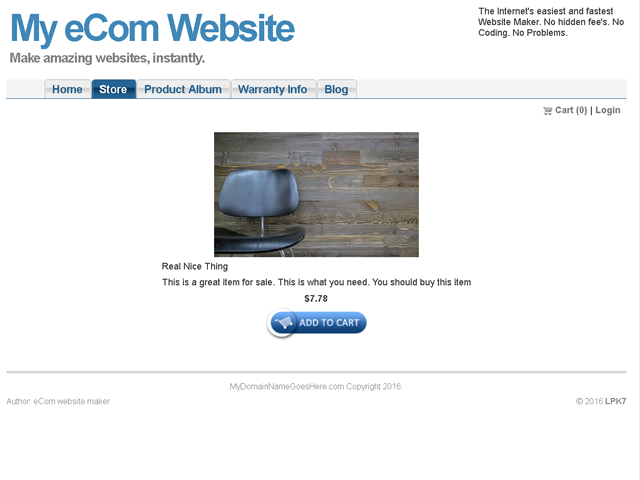
Example: A simple product sales page that is ready for customers.
You must configure a Signature Key in the Authorize.Net Merchant Interface before you can use Authorize.Net Accept Hosted payment gateway.
Authorize.Net uses the Signature Key to create a message hash that Authorize.Net sends with each notification.
To obtain the Signature Key from the Authorize.Net Merchant Interface, go to: Account > Settings > Security Settings > General Security Settings > API Credentials and Keys.
To generate Signature Key, Authorize.Net requires a verification of your identity. This is usually in a form of verifying a PIN via registered email address.