Users Guide
Chapter 3. Media (Audio, Video & Pictures)
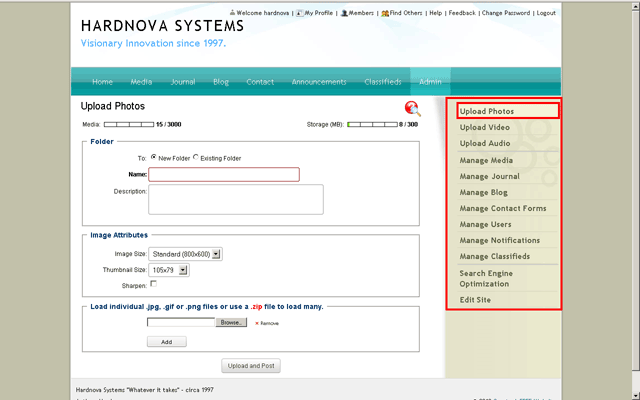
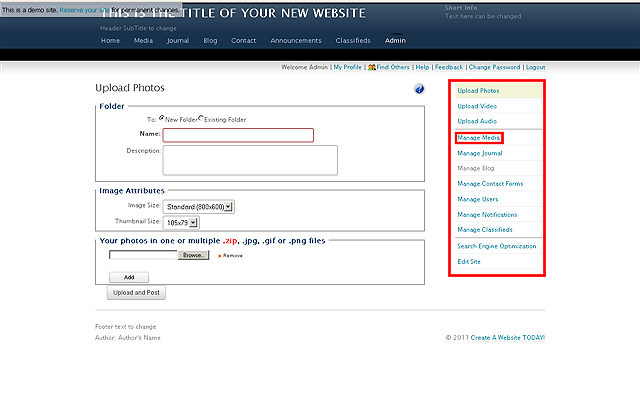
The first thing you will see once you have finished the Title & Description
wiz or anytime you log into the Admin area of your website is the UPLOAD PHOTO area.
You can access it at anytime as well by clicking the control in the Admin area.
NOTE: The AMOUNT of media files you can store with your current account
is displayed at the top as both a number/total number and STORAGE
used/total.
The control always assumes you want to make a NEW FOLDER, so if you don't then choose
one you have already made from the drop down list by clicking EXISTING FOLDER.
To
use the upload from .zip feature (super useful if you have lots
of pictures to load into the same folder) you will need to zip up your
pics before hand then simply browse to that zipped file and press the
UPLOAD AND POST button when you are ready. They will get unzipped and
resized to whatever IMAGE SIZE you selected and whatever THUMBNAIL SIZE
you selected in whatever FOLDER you named or chose. If you don't use the
.zip feature then you can still add multiple pics, you just have to add
more upload locations by clicking the ADD button. Click the REMOVE
control to get rid of any locations that are extra, if you clicked ADD
too many times.
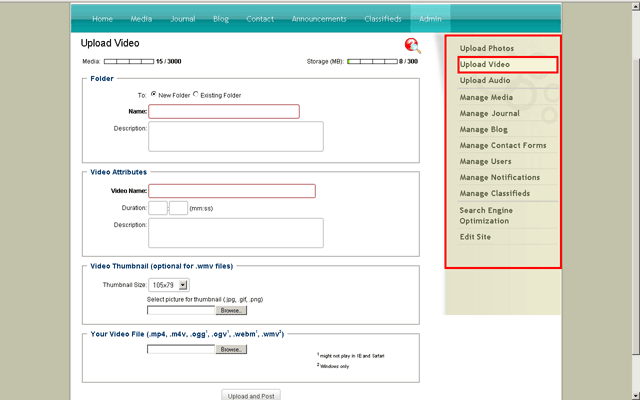
is
similar to the photo control but you cannot add a .zip file of videos and you will
have the option of telling your audience how long the video is (on some networks
this may be turned off)
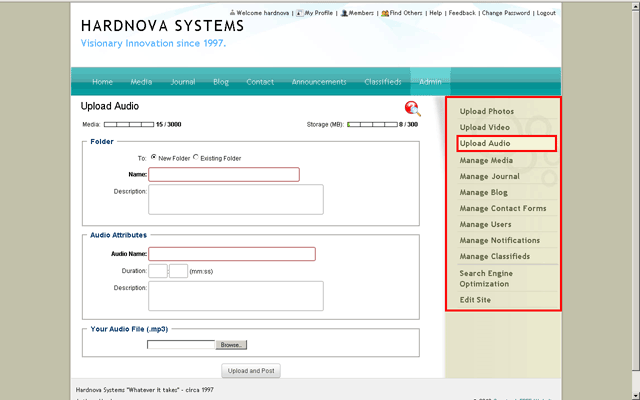
is
similar to the upload video control in that it also allows you declare how long
a file will play and you cannot load .zipped files.
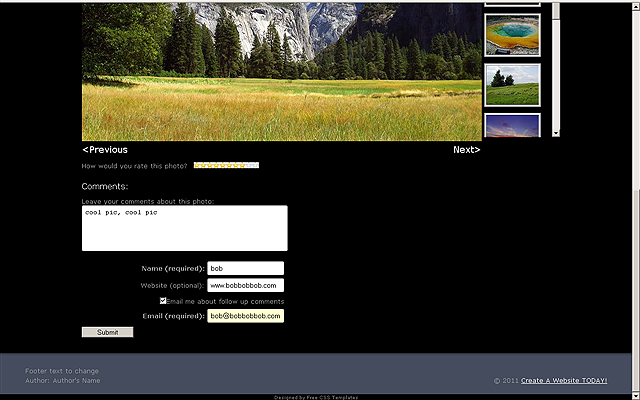
Here is what your uploaded media files look to your websites visitors.
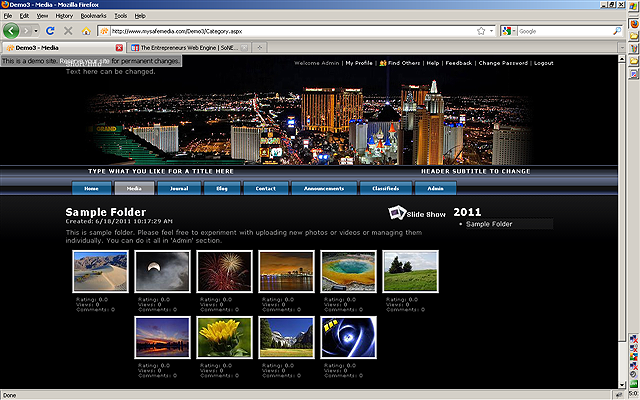
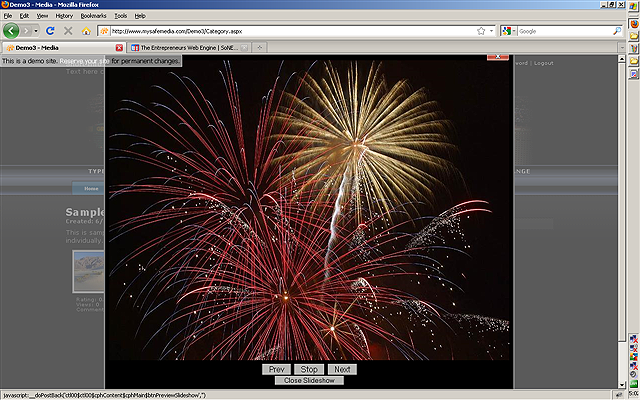
The SLIDE SHOW control (has a
picture of little slides next to it) control up at the top of the thumb nailed pics
will start an automatic slideshow
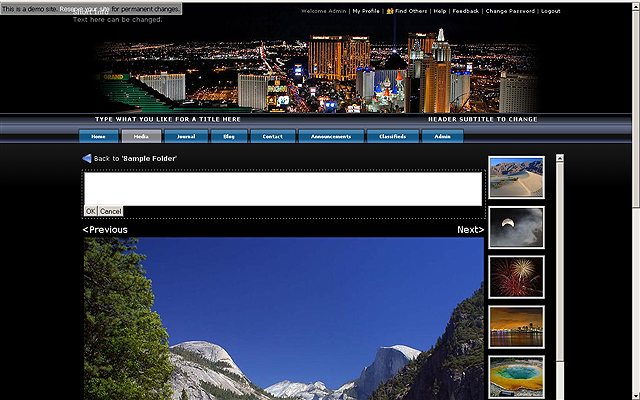
When you are logged in, you can edit the description for your media files by simply
clicking the photo then clicking the area above the photo and typing what you like.
Visitors can not edit this area.
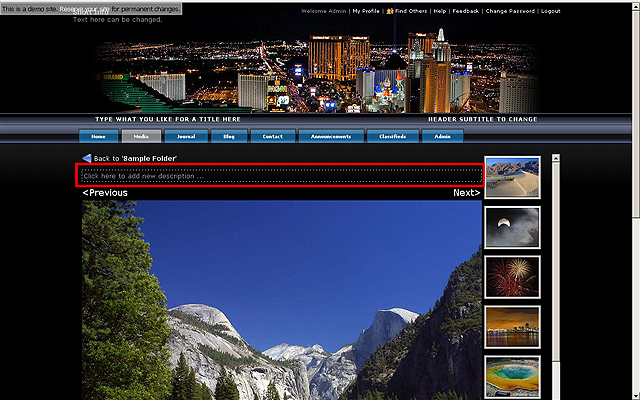
To save the description, click the OK button.
How Commenting,
Rating and Conversation Tracking works
.
The checkbox "EMAIL
ME ABOUT FOLLOW UP COMMENT" will enable the visitor to add an email address
and get notified when someone else replies to a comment they made. Ordinarily visitors
can add a name and even a backlink to their website (if it is enabled on the network,
some network owners do not allow backlinks). To COMMENT, visitors simply type a
comment and click the SUBMIT button. To Rate they simply
run the mouse over the desired
rating star or number and click
, the rating is then automatically saved.
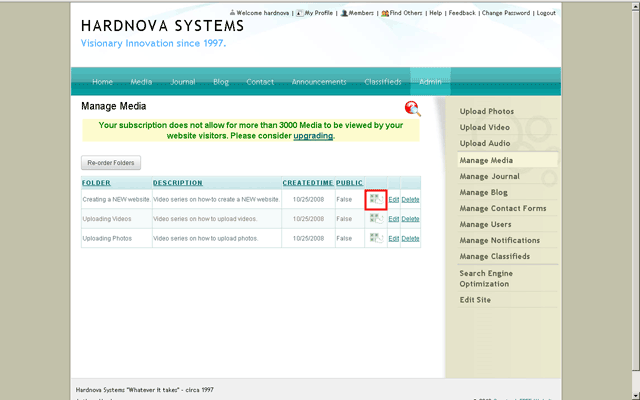
click the control on the
Admin control area on the side of the screen (usually the right side but that depends
on the template your site is using at the time). To edit your albums in
Drag N' Drop
mode click the little picture window icon to the left of Edit.
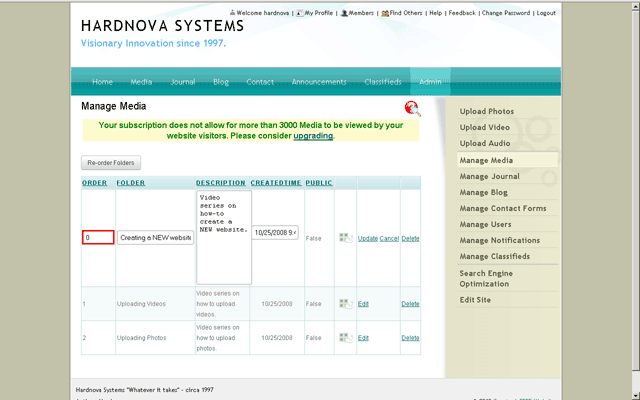
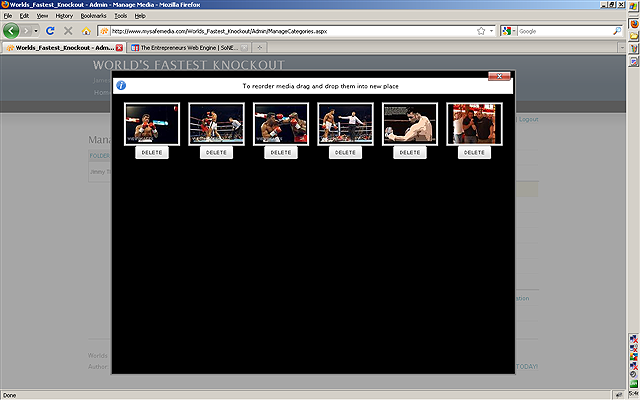
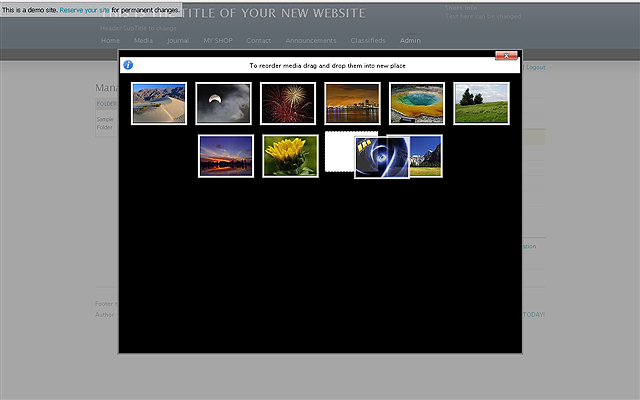
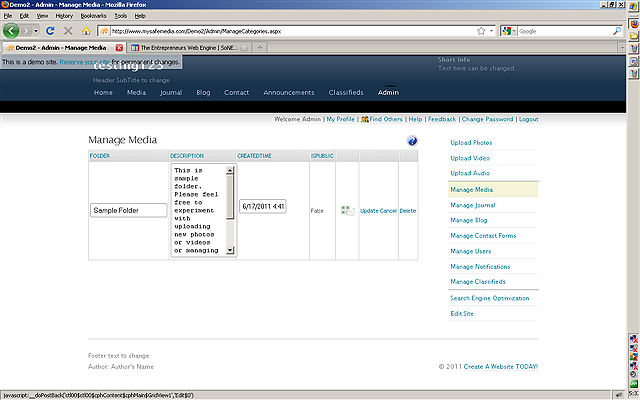
Once the MANAGE MEDIA control is clicked, the screen below shows. To enter
Drag N' Drop editing
mode click the area
in the red box below.
Now you can drag whatever media you want to move and re-order your album anyway
you like it or Delete anything you want.
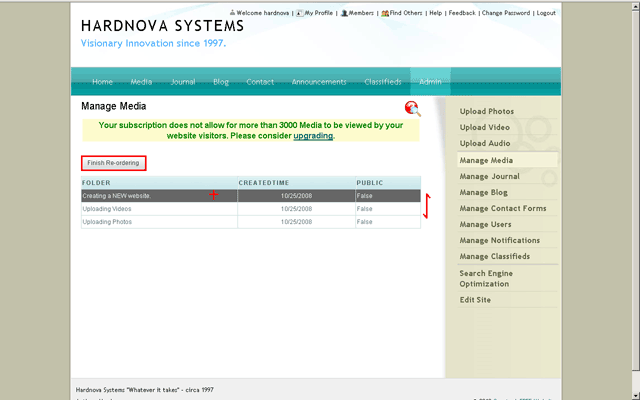
Clicking the RE-ORDER FOLDERS button lets you change which folders are
at the top of your media list.
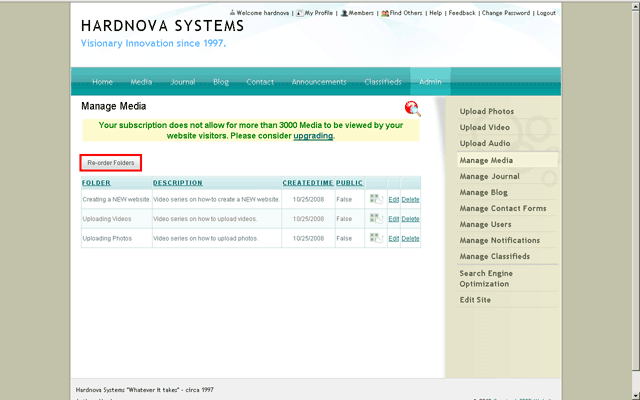
So if you want a particular folder in a certain spot on the list your
visitors see, then this button will let you drag it into place. Click
the FINISH RE-ORDERING button once done.
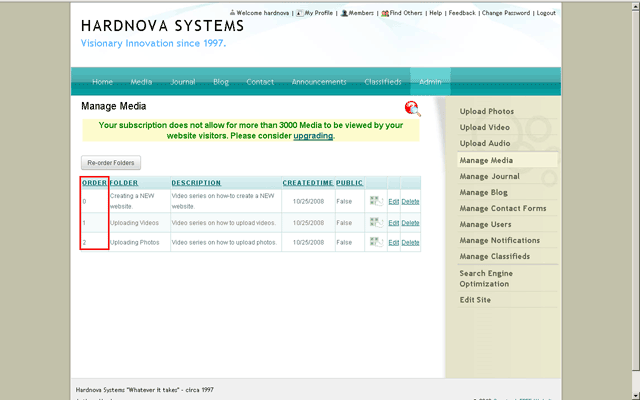
Once you have used the RE-ORDER FOLDERS button you will notice a new
column named ORDER.
Clicking the EDIT instead of the little picture window will allow you edit the entire
album details or delete it. You can even change the date the album was created on
to move it up or down. The albums will be automatically grouped by years to help
you keep track of when you took that great shot at that great event...ahh fun memories
are the best :)
IF you have used the RE-ORDER button, clicking EDIT will now allow you
to change the order manually as well. Just change the number.